
Faster releases
The hub looks for new drafts every 10 minutes. GitHub runs these schedules best-effort: on a quiet hub they can come hours apart. The doorbell starts the hub as soon as a project opens its draft. It is a small Cloudflare Worker, deployed to your own Cloudflare account.
It costs nothing on Cloudflare’s free plan. The plan allows 100,000 requests a day and 5 cron triggers. At a 10 minute interval the doorbell uses about 150 requests a day and one cron trigger.
What you need
Section titled “What you need”- A Cloudflare account with a
workers.devsubdomain. Pick the subdomain once in the Cloudflare dashboard under Workers & Pages. If you have none yet, tapster stops and links the page where you pick it. - A Cloudflare API token. tapster opens Cloudflare’s token page with the one permission it needs already filled in: Workers Scripts: Edit. You create the token there in two clicks.
Nothing else: tapster talks to Cloudflare’s API itself, so you need no Wrangler and no Node.js.
Deploy it in tapster setup
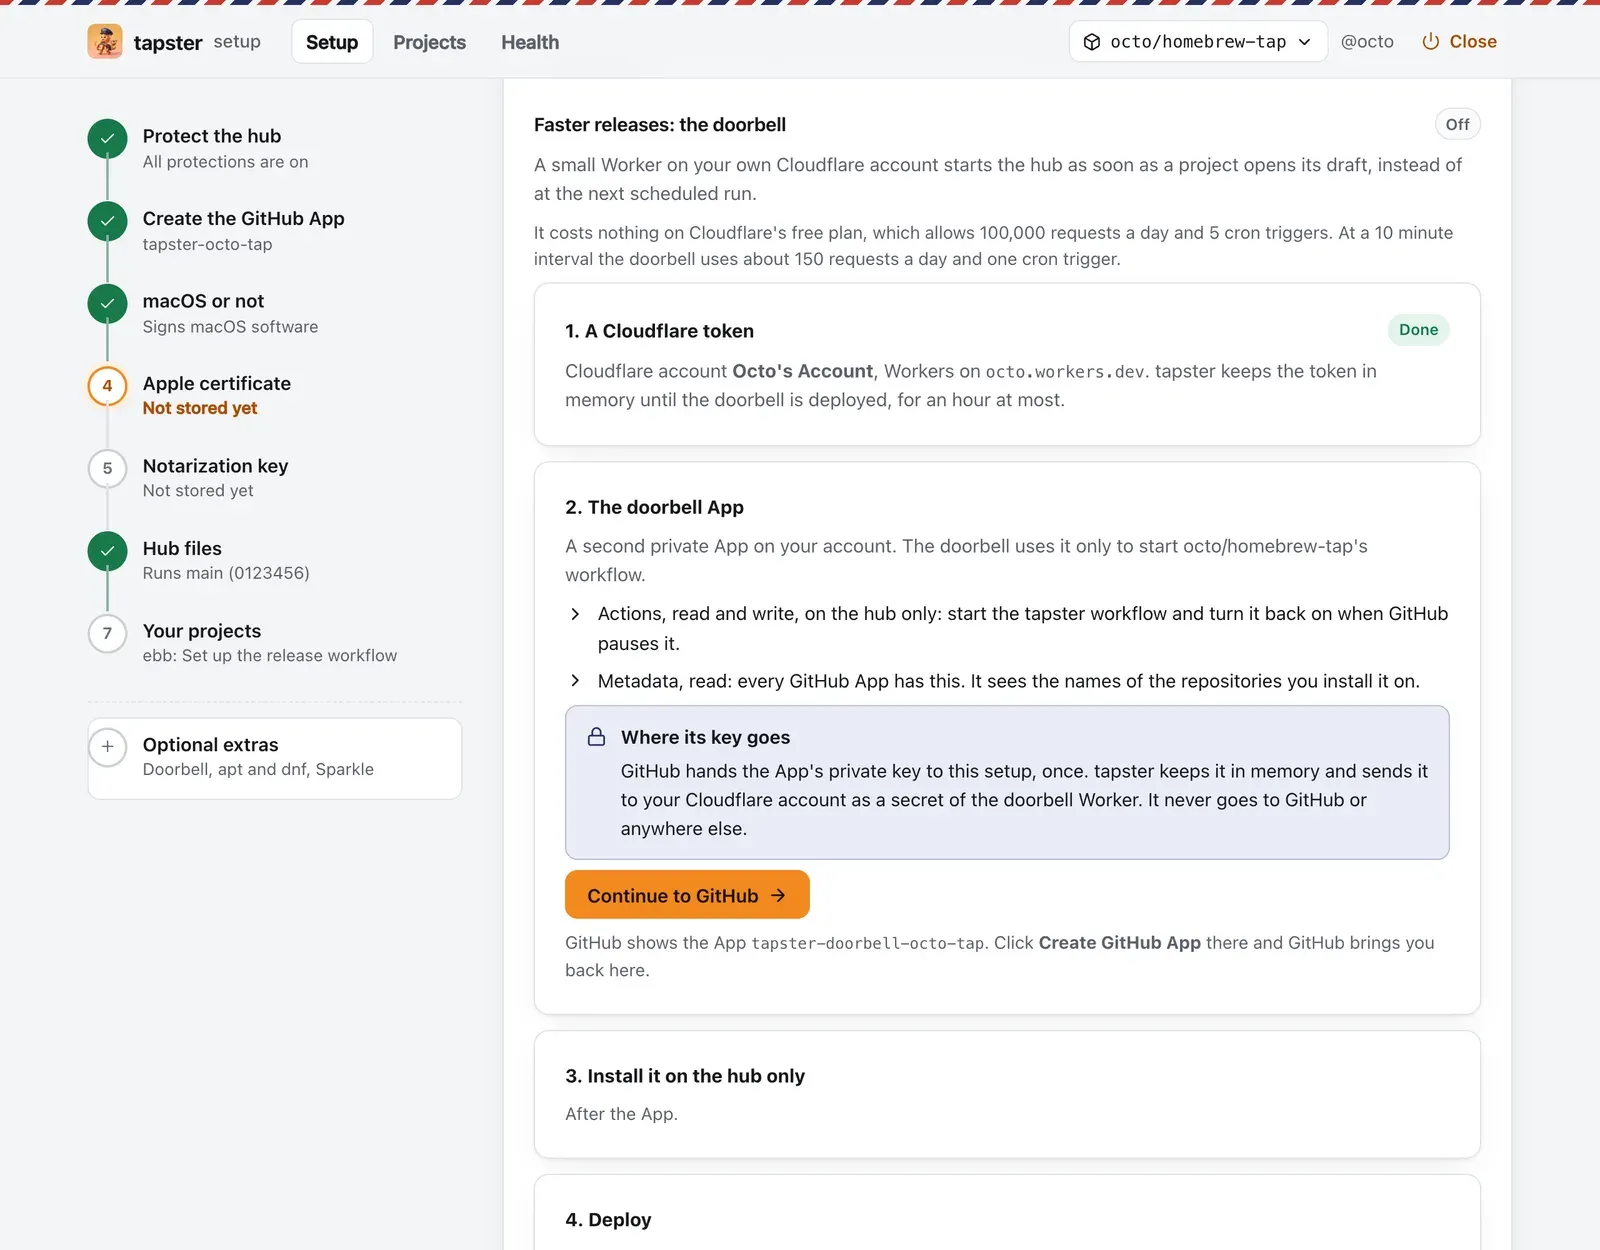
Section titled “Deploy it in tapster setup”In tapster setup, open Optional extras. The doorbell takes four steps on that page.
-
A Cloudflare token. Click Open Cloudflare’s token page. Cloudflare shows the permission Workers Scripts: Edit. Click Continue to summary, then Create Token. Copy the token it shows. Paste it into The token and click Check the token. Your password manager offers to save it under the name above the field. When the token reaches several Cloudflare accounts, the page lists them and you pick the one the doorbell runs in. To keep a token to one account, pick it under Account Resources on Cloudflare’s page.
-
The doorbell App. The page explains a second GitHub App that may only start the hub’s workflow and turn it back on. Click Continue to GitHub, then Create GitHub App. GitHub brings you back to the same step.
-
Install it on the hub only. Click Install the doorbell App. On GitHub, choose Only select repositories, pick your hub and only the hub. Click Install. The page notices within seconds. If the App reaches any other repository, the page says so and links the installation, where you remove it.
-
Deploy. Click Deploy the doorbell. tapster bundles the Worker, uploads it to your Cloudflare account and gives every project in
tapster.ymlthe doorbell’s address.
If tapster setup stops before you deploy, open Optional extras again. It continues with the App it already
created. GitHub hands an App’s key over only once, so the page asks for a new one: open the App’s settings, click
Generate a private key and drop the downloaded .pem file on the page. Delete the file and every older key on that
page once the doorbell runs.
Or deploy it in a terminal
Section titled “Or deploy it in a terminal”In an up-to-date clone of your hub, so tapster sees every project in tapster.yml:
git pullbunx @doguyilmaz/tapster init --doorbell- tapster opens Cloudflare’s token page and asks for the token with a hidden prompt. To skip the prompt, set
CLOUDFLARE_API_TOKENbefore you run the command. When the token reaches several accounts, tapster lists them and asks for the number of the one the doorbell runs in. SetCLOUDFLARE_ACCOUNT_IDto skip that question. - tapster opens a page that explains the doorbell App. Click Continue to GitHub, then Create GitHub App.
- On the install page, choose Only select repositories and pick the hub, only the hub. Click Install.
What tapster sets up on Cloudflare
Section titled “What tapster sets up on Cloudflare”Both ways make the same calls to Cloudflare’s API with your token:
- They check the token and read your account and its
workers.devsubdomain. - They upload one Worker named
tapster-doorbellwith the hub’s name, the App’s ID and the schedule as plain variables. - They store the App’s key as the Worker’s secret
APP_KEY. - They set the Worker’s cron trigger to the hub’s schedule and turn on its
workers.devaddress.
How a project rings it
Section titled “How a project rings it”tapster add and Add in tapster setup put a step named Ring the tapster hub in every release workflow. They
also give each new project the doorbell’s address when the hub has one. The step runs only when the project has that
address, so projects you added before the doorbell ring it without a change. The step sends a short-lived token from
GitHub that proves which repository and tag it comes from. The Worker checks that token and starts the hub.
The Worker also starts the hub on its own schedule when no run started in that time. When GitHub pauses the hub’s workflow for inactivity, the Worker turns it back on. A workflow you disabled yourself stays off.
Rotate its key
Section titled “Rotate its key”In Setup → Optional extras, click Replace the doorbell key. Choose a Cloudflare token for the existing account, upload a newly generated private key of the doorbell App and click Replace the key and redeploy. The address stays the same. Revoke the older App keys on GitHub after the redeployment succeeds.
The terminal does the same:
bunx @doguyilmaz/tapster init --rotate doorbelltapster asks for a new private key from the doorbell App’s settings page and a Cloudflare token, then deploys the Worker again with the new key. The token must belong to the Cloudflare account that runs the doorbell now; tapster stops before it changes anything when it does not. Delete every older key on that page afterwards. Run the same command after upgrading tapster, so the Worker runs the same version and schedule as the hub.
Limits
Section titled “Limits”- The Worker is always named
tapster-doorbell, so one Cloudflare account serves the doorbell of one hub. tapster stops before it would replace the doorbell of another hub. - Each doorbell runs in one Cloudflare account. tapster checks again right before every upload that the account’s doorbell serves your hub.